The Make Ready Checklist form serves as an essential tool for property managers and maintenance teams, ensuring that rental units are prepared for new tenants. This comprehensive document covers various aspects of each unit, from the entrance to the kitchen and bedrooms, facilitating a thorough inspection before move-in dates. The form includes specific items to check, such as doors, windows, and appliances, along with spaces for comments and work orders. Each section prompts the inspector to evaluate critical elements, including the condition of floors, walls, and lighting, and to note any necessary repairs or follow-ups. By systematically addressing these details, the checklist helps maintain property standards and enhances tenant satisfaction. It also fosters clear communication between maintenance staff and property management, streamlining the process of getting units ready for occupancy. Ultimately, the Make Ready Checklist form not only aids in ensuring compliance with safety and quality standards but also supports a positive living experience for new residents.
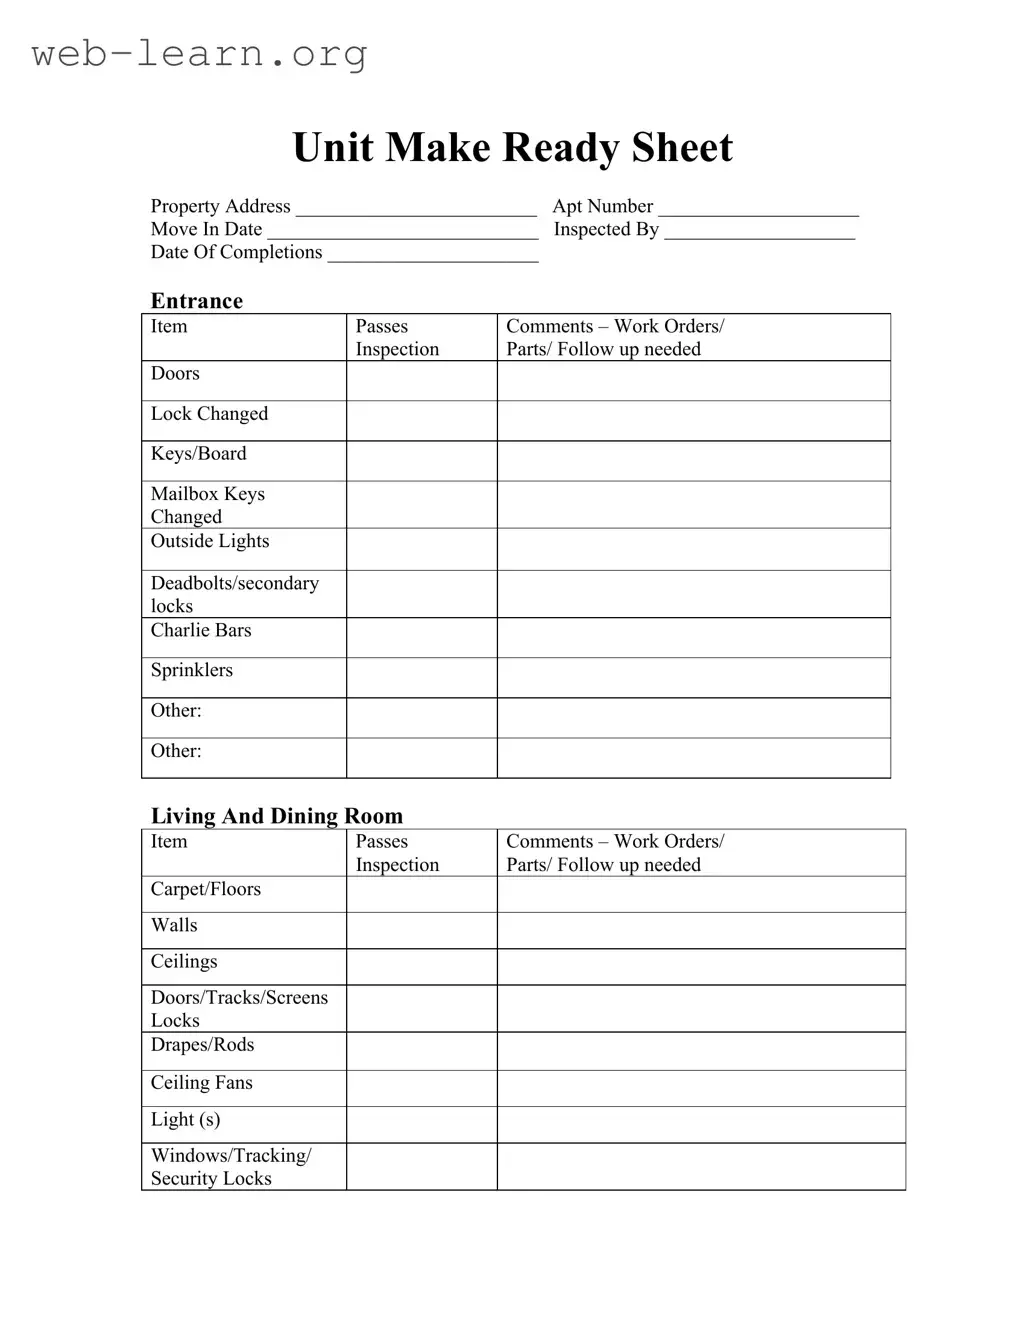
Unit Make Ready Sheet
Property Address ________________________ Apt Number ____________________
Move In Date ___________________________ Inspected By ___________________
Date Of Completions _____________________
Entrance
Item |
Passes |
Comments – Work Orders/ |
|
Inspection |
Parts/ Follow up needed |
Doors |
|
|
|
|
|
Lock Changed |
|
|
|
|
|
Keys/Board |
|
|
|
|
|
Mailbox Keys |
|
|
Changed |
|
|
Outside Lights |
|
|
|
|
|
Deadbolts/secondary |
|
|
locks |
|
|
Charlie Bars |
|
|
|
|
|
Sprinklers |
|
|
|
|
|
Other: |
|
|
|
|
|
Other: |
|
|
|
|
|
Living And Dining Room
Item |
Passes |
Comments – Work Orders/ |
|
Inspection |
Parts/ Follow up needed |
Carpet/Floors |
|
|
|
|
|
Walls |
|
|
|
|
|
Ceilings |
|
|
|
|
|
Doors/Tracks/Screens |
|
|
Locks |
|
|
Drapes/Rods |
|
|
|
|
|
Ceiling Fans |
|
|
|
|
|
Light (s) |
|
|
|
|
|
Windows/Tracking/ |
|
|
Security Locks |
|
|
Patio/Balcony/Door
Item |
Passes |
Comments – Work Orders/ |
|
Inspection |
Parts/ Follow up needed |
Railings/Fence |
|
|
|
|
|
Floor |
|
|
|
|
|
Outside Lights |
|
|
|
|
|
Entrance Door |
|
|
Painted/Exterior |
|
|
Outside Closets |
|
|
|
|
|
Patio Door/Screen |
|
|
|
|
|
Other: |
|
|
|
|
|
Kitchen
Item |
Passes |
Comments – Work Orders/ |
|
Inspection |
Parts/ Follow up needed |
Stove/Drawer |
|
|
|
|
|
Burners |
|
|
|
|
|
Drip Pan |
|
|
Oven Door |
|
|
|
|
|
Racks |
|
|
|
|
|
Oven Liner |
|
|
Refrigerator/Rack/ |
|
|
Condensate Plate |
|
|
Light |
|
|
|
|
|
Crisper |
|
|
Thermostat |
|
|
|
|
|
Racks |
|
|
|
|
|
Dishwasher/Operating/ |
|
|
Leaking |
|
|
Basket |
|
|
|
|
|
Racks |
|
|
|
|
|
Wheels |
|
|
Sink/Stopper/Leaking |
|
|
Washer |
|
|
|
|
|
|
|
|
|
|
|
Seats |
|
|
Sprayer |
|
|
Strainer |
|
|
|
|
|
Aerator |
|
|
|
|
|
Disposal/Leaking |
|
|
Kitchen Continued
Item |
Passes |
Comments – Work Orders/ |
|
Inspection |
Parts/ Follow up needed |
Moisture Anywhere |
|
|
|
|
|
Range/Hood/Filter/Fan |
|
|
|
|
|
Walls |
|
|
|
|
|
Ceilings |
|
|
|
|
|
Floor/Tile |
|
|
|
|
|
Cabinets/Counter |
|
|
|
|
|
Lighting/Outlets/ |
|
|
Switchplates/GFI’s |
|
|
HVAC Vents |
|
|
|
|
|
Windows/Screens/ |
|
|
Locks/Pins |
|
|
Drawers |
|
|
|
|
|
Other: |
|
|
|
|
|
Other: |
|
|
|
|
|
Bedroom 1
Item |
Passes |
Comments – Work Orders/ |
|
Inspection |
Parts/ Follow up needed |
Walls |
|
|
|
|
|
Ceilings |
|
|
|
|
|
Carpets/Floors |
|
|
|
|
|
Doors/Stops |
|
|
|
|
|
Windows/Locks/ |
|
|
Screens/Pins |
|
|
Drapes/Rods |
|
|
|
|
|
Lighting/Outlets |
|
|
|
|
|
Closets/Doors |
|
|
|
|
|
A/C / Vents |
|
|
|
|
|
Other: |
|
|
|
|
|
Other: |
|
|
|
|
|
Bedroom 2
Item |
Passes |
Comments – Work Orders/ |
|
Inspection |
Parts/ Follow up needed |
Walls |
|
|
|
|
|
Ceilings |
|
|
|
|
|
Carpets/Floors |
|
|
|
|
|
Doors/Stops |
|
|
|
|
|
Windows/Locks/ |
|
|
Screens/Pins |
|
|
Drapes/Rods |
|
|
|
|
|
Lighting/Outlets |
|
|
|
|
|
Closets/Doors |
|
|
|
|
|
A/C / Vents |
|
|
|
|
|
Other: |
|
|
|
|
|
Other: |
|
|
|
|
|
Bedroom 3
Item |
Passes |
Comments – Work Orders/ |
|
Inspection |
Parts/ Follow up needed |
Walls |
|
|
|
|
|
Ceilings |
|
|
|
|
|
Carpets/Floors |
|
|
|
|
|
Doors/Stops |
|
|
|
|
|
Windows/Locks/ |
|
|
Screens/Pins |
|
|
Drapes/Rods |
|
|
|
|
|
Lighting/Outlets |
|
|
|
|
|
Closets/Doors |
|
|
|
|
|
A/C / Vents |
|
|
|
|
|
Other: |
|
|
|
|
|
Other: |
|
|
|
|
|
Hallways
Item |
Passes |
Comments – Work Orders/ |
|
Inspection |
Parts/ Follow up needed |
|
|
|
Air Handler |
|
|
|
|
|
Air Filter/Sticker |
|
|
|
|
|
Fire Extinguisher |
|
|
|
|
|
Smoke Alarm |
|
|
|
|
|
Ceilings |
|
|
|
|
|
Walls |
|
|
|
|
|
Carpet/Floors |
|
|
|
|
|
Closet/Doors |
|
|
|
|
|
Lighting/Outlets |
|
|
|
|
|
Other: |
|
|
|
|
|
Other: |
|
|
|
|
|
Bathroom 1
Item |
Passes |
Comments – Work Orders/ |
|
Inspection |
Parts/ Follow up needed |
|
|
|
Walls |
|
|
|
|
|
Ceiling |
|
|
Floor/Tiles |
|
|
|
|
|
Bath Tile/Grout |
|
|
|
|
|
Shower/Tub |
|
|
|
|
|
Toilette/Seat |
|
|
|
|
|
Check Plumbing/ |
|
|
Stopper |
|
|
|
|
|
Vent Fan |
|
|
|
|
|
Cabinet/Counter |
|
|
|
|
|
Sink |
|
|
|
|
|
Doors/Stops |
|
|
|
|
|
Lighting/Outlets/GFI’s |
|
|
|
|
|
Med Cab/Mirrors |
|
|
|
|
|
Towel Bars/Shower |
|
|
Rods |
|
|
|
|
|
Heater |
|
|
Mold/Mildew |
|
|
|
|
|
Fans |
|
|
|
|
|
Leaks |
|
|
|
|
|
Other |
|
|
|
|
|
Bathroom 2
Item |
Passes |
Comments – Work Orders/ |
|
Inspection |
Parts/ Follow up needed |
|
|
|
Walls |
|
|
|
|
|
Ceiling |
|
|
|
|
|
Floor/Tiles |
|
|
|
|
|
Bath Tile/Grout |
|
|
|
|
|
Shower/Tub |
|
|
|
|
|
Toilette/Seat |
|
|
|
|
|
Check Plumbing/ |
|
|
Stopper |
|
|
|
|
|
Vent Fan |
|
|
|
|
|
Cabinet/Counter |
|
|
Sink |
|
|
|
|
|
Doors/Stops |
|
|
|
|
|
Lighting/Outlets/GFI’s |
|
|
|
|
|
Med Cab/Mirrors |
|
|
|
|
|
Towel Bars/Shower |
|
|
Rods |
|
|
|
|
|
Heater |
|
|
|
|
|
Mold/Mildew |
|
|
|
|
|
Fans |
|
|
|
|
|
Leaks |
|
|
|
|
|
Other |
|
|
|
|
|
| Fact Name | Description | Governing Law |
|---|---|---|
| Purpose | The Make Ready Checklist is used to ensure that a rental unit is ready for a new tenant. | State-specific landlord-tenant laws |
| Inspection Items | The checklist includes various items to inspect, such as doors, appliances, and plumbing. | State-specific housing codes |
| Completion Date | The form requires a completion date to track when the unit is ready. | State-specific rental laws |
| Comments Section | Each item has a comments section for noting any work orders or follow-up needed. | State-specific property maintenance regulations |
Completing the Make Ready Checklist form is an important step in ensuring that a property is ready for new occupants. Follow the steps below to accurately fill out the form. Each section requires careful attention to detail, so take your time to ensure all information is recorded correctly.
Now, proceed to the various sections of the form, starting with the Entrance section. For each item listed, mark whether it Passes or not, and provide comments as necessary.
After filling out all sections, review the form for any missing information or comments. Ensure that all necessary follow-up actions are noted. Once completed, the form is ready for submission.
What is the purpose of the Make Ready Checklist form?
The Make Ready Checklist form serves as a comprehensive guide for property managers and maintenance teams to ensure that rental units are prepared for new tenants. It outlines various areas and items that need to be inspected and addressed before a tenant moves in. By following this checklist, property managers can maintain high standards of living conditions and ensure tenant satisfaction.
What items are included in the checklist?
The checklist covers multiple areas of the rental unit, including:
Each section contains specific items that need to be inspected, such as doors, windows, appliances, and plumbing fixtures. Comments can be added for any work orders or follow-up needed.
How should the checklist be used?
To use the checklist effectively, property managers or maintenance staff should conduct a thorough inspection of each area listed. As they examine each item, they should mark whether it passes inspection or requires further work. Comments should be added for any issues found, detailing necessary repairs or follow-up actions. This ensures nothing is overlooked and helps streamline the preparation process.
Who is responsible for completing the Make Ready Checklist?
The responsibility for completing the checklist typically falls on the property management team or maintenance personnel. They should ensure that all items are inspected and addressed prior to a new tenant’s move-in date. Additionally, the form may be signed by the person conducting the inspection to verify its completion.
What should be done if an item fails inspection?
If an item fails inspection, it is crucial to document the issue in the comments section of the checklist. This documentation should include details about the problem and any work orders generated for repairs. Timely follow-up is essential to ensure that all issues are resolved before the new tenant arrives.
Can the checklist be customized for different properties?
Yes, the Make Ready Checklist can be customized to suit the specific needs of different properties. Property managers may add or remove items based on the unique features of each unit or property type. Customization helps ensure that all relevant areas are addressed during the make-ready process.
Is there a specific timeline for completing the checklist?
While there is no universally mandated timeline, it is advisable to complete the Make Ready Checklist as soon as possible after a tenant vacates the unit. Ideally, the checklist should be finalized before the new tenant’s scheduled move-in date to allow adequate time for any repairs or cleaning that may be necessary.
When completing the Make Ready Checklist form, several common mistakes can lead to delays and complications. One of the most frequent errors is failing to provide complete information. Each section of the checklist requires specific details such as the property address, apartment number, and inspection dates. Omitting any of this information can cause confusion and may require additional follow-up.
Another common mistake is not thoroughly inspecting each item listed on the form. It is essential to check all aspects of the unit, including doors, windows, and appliances. Skipping items or marking them as "pass" without proper verification can result in unresolved issues that may affect future tenants.
People often overlook the importance of adding comments or notes in the designated areas. Providing detailed comments about the condition of items or any work orders needed helps create a clear record. This information is crucial for maintenance teams and can prevent misunderstandings later on.
Additionally, some individuals forget to update the checklist after completing repairs or maintenance. If changes are made after the initial inspection, it is vital to document these updates on the form. This ensures that all parties are aware of the current state of the unit.
Another mistake is not obtaining the necessary signatures. The checklist requires a signature from the person conducting the inspection. Failing to include this can lead to questions about accountability and the completion of tasks.
In some cases, people may rush through the form without taking the time to review it for accuracy. A quick glance may not catch errors or omissions. Taking a moment to double-check the form can save time and effort in the long run.
Finally, not keeping a copy of the completed checklist can be a significant oversight. Retaining a copy for reference ensures that there is a record of the unit's condition and any work performed. This can be invaluable for future inspections and tenant relations.
When preparing a rental unit for new tenants, several forms and documents are often utilized alongside the Make Ready Checklist. These documents help ensure that the property is in good condition and that all necessary tasks are completed before the new occupants move in. Below is a list of common forms that may be used in conjunction with the Make Ready Checklist.
Using these forms in conjunction with the Make Ready Checklist can streamline the process of preparing a rental unit. They help ensure that all necessary aspects of the property are addressed, providing peace of mind to both landlords and tenants.
Inspection Checklist: Similar to the Make Ready Checklist, an inspection checklist is used to assess the condition of a property before a new tenant moves in. It ensures that all necessary repairs and maintenance tasks are completed.
Maintenance Checklist: This document outlines routine maintenance tasks that need to be performed in a property. Like the Make Ready Checklist, it helps ensure that everything is in working order and identifies any repairs needed.
Move-In Inspection Report: This report details the condition of a rental unit at the time of a tenant's move-in. It serves a similar purpose as the Make Ready Checklist by documenting the state of various items and areas within the property.
Property Condition Report: This document provides a comprehensive overview of the property's condition. It is akin to the Make Ready Checklist, focusing on the various aspects of the property that need attention before a new tenant arrives.
Repair Request Form: A repair request form allows tenants to report issues that need fixing. It parallels the Make Ready Checklist by tracking necessary repairs, ensuring that all items are addressed before occupancy.
Cleaning Checklist: This checklist outlines the cleaning tasks needed before a tenant moves in. It complements the Make Ready Checklist by ensuring the property is not only functional but also clean and presentable.
Inventory Checklist: An inventory checklist details the items included in a rental property. It is similar to the Make Ready Checklist as it verifies that all necessary items are present and in good condition before the tenant's arrival.
Safety Inspection Checklist: This document focuses on safety features within a property, such as smoke alarms and fire extinguishers. It aligns with the Make Ready Checklist by ensuring that all safety measures are in place before a tenant moves in.
Utilities Checklist: This checklist ensures that all utilities are functioning properly before a tenant takes possession. Like the Make Ready Checklist, it helps confirm that essential services are ready for use.
Final Walkthrough Checklist: Used during the final walkthrough before a tenant moves in, this checklist confirms that all tasks have been completed. It serves a similar purpose to the Make Ready Checklist by ensuring the property is ready for occupancy.
When filling out the Make Ready Checklist form, it’s essential to ensure accuracy and clarity. Here’s a helpful list of dos and don’ts to guide you through the process.
Understanding the Make Ready Checklist form is crucial for ensuring a smooth transition into a new living space. However, several misconceptions can lead to confusion. Here are four common misconceptions:
By addressing these misconceptions, both tenants and landlords can better utilize the Make Ready Checklist to ensure a well-maintained and welcoming living environment.
When filling out and using the Make Ready Checklist form, consider the following key takeaways: